How to start climbing: a beginner’s guide
Updated 7 October 2026
The easiest way to start climbing is to walk into an indoor climbing gym and try bouldering: short climbs over thick mats, with no ropes and no gear except climbing shoes, which you can rent at the desk. If you’d rather climb with ropes, book the gym’s intro session and the staff will show you everything. You don’t need to be strong to begin: technique matters far more than strength.
What happens on your first visit
Every gym does it a little differently, but a first visit usually goes like this:
- You register. You fill in a form or waiver, often online before you arrive. It explains the risks and asks how much climbing you’ve done. Answer honestly: it decides what you’re allowed to do on your own.
- You get a short induction. For bouldering this is usually a quick safety talk: how to fall, where not to stand, and how the grades or colours work. Some gyms use a video or a set of signs.
- You rent shoes. Ask at the desk. That’s all you need for bouldering.
- For ropes, you book a session. You can’t usually pick up a rope and go. Gyms run taster sessions, where an instructor belays you and all the equipment is provided, and learn-to-climb courses, where you learn to tie in and belay. To climb with ropes without staff, most gyms then ask you to pass a short belay check.
Under-18s usually have extra rules, such as a parent signing the form or climbing only with an instructor. Check the gym’s website before you go.
Why bouldering is the easiest way in
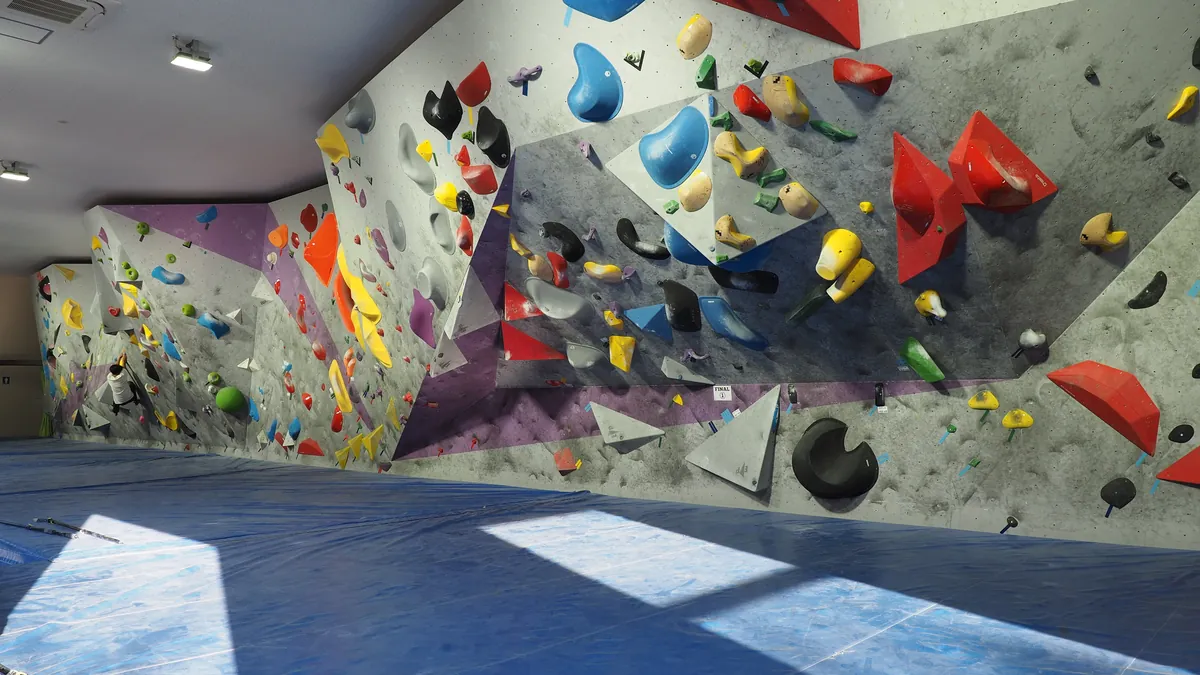
Bouldering means climbing short walls, only a few metres high, without a rope or harness. The floor underneath is one big padded mat, and each climb (called a “problem”) is marked by the colour of its holds or a tag at the start. You can go alone, climb for as long as you like, and you only need shoes.
Start on the easiest problems, even if they look too easy. Gyms grade them with colours, the V-scale (V0, V1…) or Font grades (4, 5, 6A…); bouldering grades explained shows how those work. If you want to try ropes later, the types of climbing explains top rope, auto-belays and lead.
What you need (almost nothing)
- Climbing shoes. Rent them at the gym. They should feel snug but not painful.
- Chalk (optional). It keeps your hands dry so you grip better. Many gyms sell it, and a chalk bag is cheap if you keep going.
- Harness, belay device and locking carabiner. Only for rope climbing. Gyms rent them, and taster sessions include them.
What to wear
- Clothes you can stretch in: leggings, joggers, shorts or normal gym clothes. Jeans restrict your movement, and very baggy clothes can catch on holds.
- No rings or jewellery. Rings can injure your fingers or get damaged; if one won’t come off, cover it with tape and tell your instructor. Necklaces and bracelets can snag.
What it costs
For a first visit you’ll pay for a day pass plus shoe hire. Rope taster sessions and courses cost extra, and usually include equipment. Prices vary a lot between cities and gyms, and most gyms list them on their website. Our climbing gym pages list prices, opening hours and how to book for more than 280 gyms, and gyms near me finds the closest ones to you.
If you keep going, many gyms sell multi-visit passes or memberships, and shoe hire adds up quickly. That’s the point where buying your own shoes starts to pay off.
How often to climb when you’re new
Two or three sessions a week, with a rest day between them, is plenty at first; Movement’s coaches call it the golden range for new climbers. Climbing every day is where it gets risky. Your muscles get stronger quickly, but the tendons and ligaments in your fingers adapt more slowly, and hanging off your fingertips puts a lot of strain on them. That gap is why beginners who climb every day often get hurt.
- Warm up first. A few minutes of light exercise and gentle stretching, then the easiest climbs in the gym.
- Keep sessions short. An hour is plenty for the first few visits. You can build up to two or three hours over months.
- Stop before you’re exhausted. Most injuries happen when people are tired and having “one last go”.
- Look after your skin. Sore fingertips are normal at first, and they toughen up with regular climbing. If your hands or feet really hurt, that’s the session over.
Common beginner mistakes
- Pulling with your arms. Your legs are much stronger. Beginners rely on their arms far too much and tire fast; push up with your feet and let your arms guide you.
- Bending your arms all the time. Hang on straight arms whenever you can, so your skeleton takes the weight instead of your muscles.
- Over-gripping. Squeezing every hold as hard as you can burns out your forearms. Hold on just firmly enough.
- Careless feet. Look at each foothold, place your foot on it precisely, then trust it. Good footwork matters more than strength.
- Trying too hard too soon. Projecting the hardest problem in the gym, or climbing several days in a row, is the quickest way to hurt a finger. Technique first; strength comes with time.
- Jumping off from the top. Climb down as far as you can, then drop onto both feet. Is climbing safe? covers how to fall.
When to buy your own shoes
Shoes are the first thing to buy, once you’re climbing regularly. Your own pair will fit better than rental shoes, and a good fit matters more than the brand or model: snug, toes near the end, but not painful. You don’t need to buy shoes two sizes too small, and every brand fits differently, so try several. Our climbing shoe size finder shows your size in 290+ models from your street shoe size.
If you start climbing with ropes, a harness, belay device and locking carabiner come next. Ask the gym staff or a climbing shop to help you choose.
Where to go from here
Once you’re climbing every week, the grades become a good way to track your progress: see bouldering grades explained, or sport climbing grades explained if you take up ropes.
Sources
- BMC: The basics: climbing indoors
- Movement: How often should new climbers climb?
- BMC: All you need to know about starting indoor bouldering
- BMC: Beginner climber FAQs
- BMC: What gear do you need to climb indoors?
- BMC: How to climb 6a: 10 expert tips
- BMC: FUNdamentals of Climbing guidance notes (PDF)
- Mountaineering Scotland: Indoor climbing, getting started
- DAV: Sicher Bouldern indoor (5 DAV recommendations)
- Wikipedia: Climbing injuries
- Mersmann, Bohm & Arampatzis (2017): Imbalances in the development of muscle and tendon
Read more
- Types of climbing explained: bouldering, top rope, lead, auto-belay and more
- Is climbing safe? How to climb safely as a beginner
- Why are there so many climbing grade systems?
- Bouldering grades explained: the V-scale and Font
- Sport climbing grades explained: French, YDS and UIAA
- Can you compare bouldering and sport climbing grades?
- The hardest boulders in the world (2026)
- How hard is V17?
- How long does it take to climb V5?
- Stuck at V4 or V5? Why climbers plateau, and what helps